How to Use Non-Stick Fiberglass Mesh

Fiberglass mesh is a great way to create a mosaic. It is perfect for when you are creating a large mosaic and want to work over a flat surface that is indoors - like your studio. Mesh is fun to use when you are creating individual "elements" to install on a wall or the like. Mesh also helps to stabilize substrates like styrofoam, so it can handle the weight of your tiles like I used in the image above.
A word of caution here - fiberglass mesh obviously has fiberglass in it so if you have allergies or get rashes from touching fiberglass, then wear long sleeve shirts and gloves to keep your skin from making contact with it. Sometimes we tend to lean over and rest our arms on the mesh and after awhile, you may notice a red rash. So just be aware and wear appropriate clothing. You may also prefer to wear a mask if you are especially sensitive.
Here are step-by-step instructions to using regular fiberglass mesh in your mosaics.
The Set Up:
First, make sure your pattern is easy to see underneath your mesh. Hold a piece of mesh over the pattern first and make sure you can see it clearly. If you can't, then use a black marker and trace over the pattern's lines making them visible.
After that is done, here are the steps:
1) Tape your pattern securely down onto your flat work surface. This keeps it from moving.
2) Lay a clear, plastic sheet (clear cling wrap or clear plastic) over your pattern and tape it down as well. This catches any glues and prevents your pattern from sticking to the back of your mesh.

3) Cut a piece of mesh to fit the pattern and tape it over the clear sheet. We don't want any moving around.

Now you are set up to mosaic over your pattern.
Glues/Adhesives:
If your mosaic will be indoors, I recommend you use weld bond for gluing each tile to the mesh. If this will be an outdoor mosaic, then thin set is the appropriate glue for it.
1) Put your glue on the back of each tile and press it down onto the mesh. Do not spread the glue onto the mesh and then lay your tiles into it. The reason you glue each tile individually is to prevent glues from covering up the pattern underneath and to keep you from using too much glue, which will in turn, squish up in-between each tile and prevent your grout from having space to go into.

2) Whenever too much glue squishes out beyond your tile, use a pick and scape away. The cleaner you work, the easier it will be for grouting and cleaning.
Installing your mosaic on mesh:
1) When you are finished and it is all dry, gently pick it up or slide it from the clear plastic sheet. You can now trim away any unnecessary mesh.
2) If you are transporting it to a different area, slide it on a stable backer like a piece of cardboard or wood, etc. so it will support your mosaic.
3) Spread your glue (weld bond or thinset) onto either your wall or substrate that the mesh is going onto. A trowel can help spread your glue if needed.
4) Carefully lay your mosaic into the adhesive. You may need another person to help you if you are working with larger sections.
5) Press the mosaic into your adhesive firmly and begin cleaning away any excess glue that is squishing up the sides of the tiles.

If it starts to slide due to gravity, secure with tape or push pins, whatever you can to hold it in place. Let dry 24 hours, then grout and clean.
Additional Tips:
Make sure you press your tiles (with glue on their backs) securely down on the mesh. A slight "twist" also helps seat the tile onto the mesh
Do not use tiles smaller than 3/8" as they tend to fall off easily. There just isn't enough mesh to hold the tiny pieces on.
Always cut the mesh into "workable" sections such as 12" x 12" as any larger, then the mesh may bend, pop tiles off, and be difficult to move about or transport.
If you can glue your tiles directly to the surface of smaller projects, there is no real need for mesh. Its best uses are for large installations and working off-site from a project when you need to create a mosaic away from difficult climate conditions.
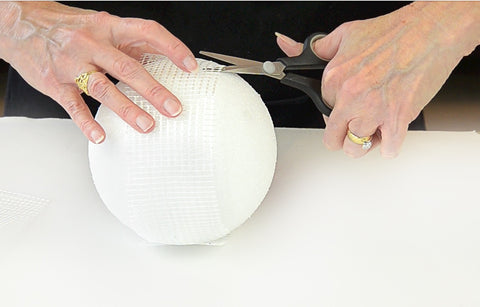
Mesh is also great for covering styrofoam balls. Just cut small pieces of mesh and thinset them to the styrofoam ball. Get your mesh here!
Excellent instruction. Thank you very much.🌹
Thanks Lou Ann, for this information. I have been interested to try mesh for a long time, but the right project hasn’t come along ad a little fear has kept me from creating the right project. You have taken the fear out this for me.